Google Sign In Android 範例 - 使用最新的 One Tap
前言
串接 Google Sign 不外乎在 Google Cloud 進行設定、在 APP 引入 SDK、APP 與 Server API 串接。
本篇文章紀錄 Android APP 設定/實現的步驟。
另外需要特別注意的地方是,我們一共會在 Google Cloud 設置3組 OAuth2.0用戶端ID。
Google Cloud 設定
首先,
需要在 Google Cloud Console 新增專案
接著,
在側邊欄「API和服務」 -> 「OAuth 同意畫面」填入相關設定
接著,
在 「憑證」 -> 「OAuth 同意畫面」 建立 OAuth 用戶端 ID
要建立的用戶端 ID 有2個
1. Android
2. 網頁應用程式
也許會認為為何 Android APP 需要建立網頁應用程式,這是因為在登入時,需要填入「ServerClientID」才能獲取 GoogleIDToken,以利上傳至 Server。
另外,在建立 Android 時,會需要輸入 SHA-1 憑證指紋:
SHA1憑證指紋
在 Google Cloud Console 就可以看到產生指紋的提示
keytool -keystore path-to-debug-or-production-keystore -list -v
但是 keystore 還是得自己手動產生:
建立 keystore
回到 Android Studio,點擊上方「Build」 -> 「Generate Signed Bundle / APK...」,可以點擊「Create new...」產生一個新的 Key store,
資訊填妥之後,也會產生一個「private_key.pepk」檔案。
根據先前的經驗,這些資訊請妥善保存,否則一但上架後,過了很久要發布新版本,如果檔案不見就 GG了。
但是聯絡 Google Developer 客服,客服人員也會協助處理。
接著,就可以透過剛剛產生好的 keystore 產生 SHA-1 憑證指紋了 (執行 keytool 指令)
繼續在 Android APP 撰寫程式
在 Google Cloud Console 完成設定之後,回到 Android Studio 繼續寫 Code...
只需要依照官方文件的引導,在 build.gradle 的 dependencies 引入
implementation 'com.google.android.gms:play-services-auth:20.4.1'
接著撰寫程式即可
這邊偷懶,直接貼上範例 code
上架到 Google Play 後
當一切就緒,登入功能運行無誤,APP上傳到 Google Play 封閉測試/發布上架後,
發現登入居然失敗了!
可能是使用者點擊登入後就沒反應,
也可能是出現錯誤代碼13。
應用程式簽署
當 APP 上傳到 Google Play 之後,
Google Play 會產生一個新的簽名,
可以在 Google Play 找到:
Google Play -> 該應用程式 -> 設定 -> 應用程式完整性 -> 應用程式簽署
這時候只要將該 SHA-1 憑證指紋,再次添加到 Google Cloud 即可
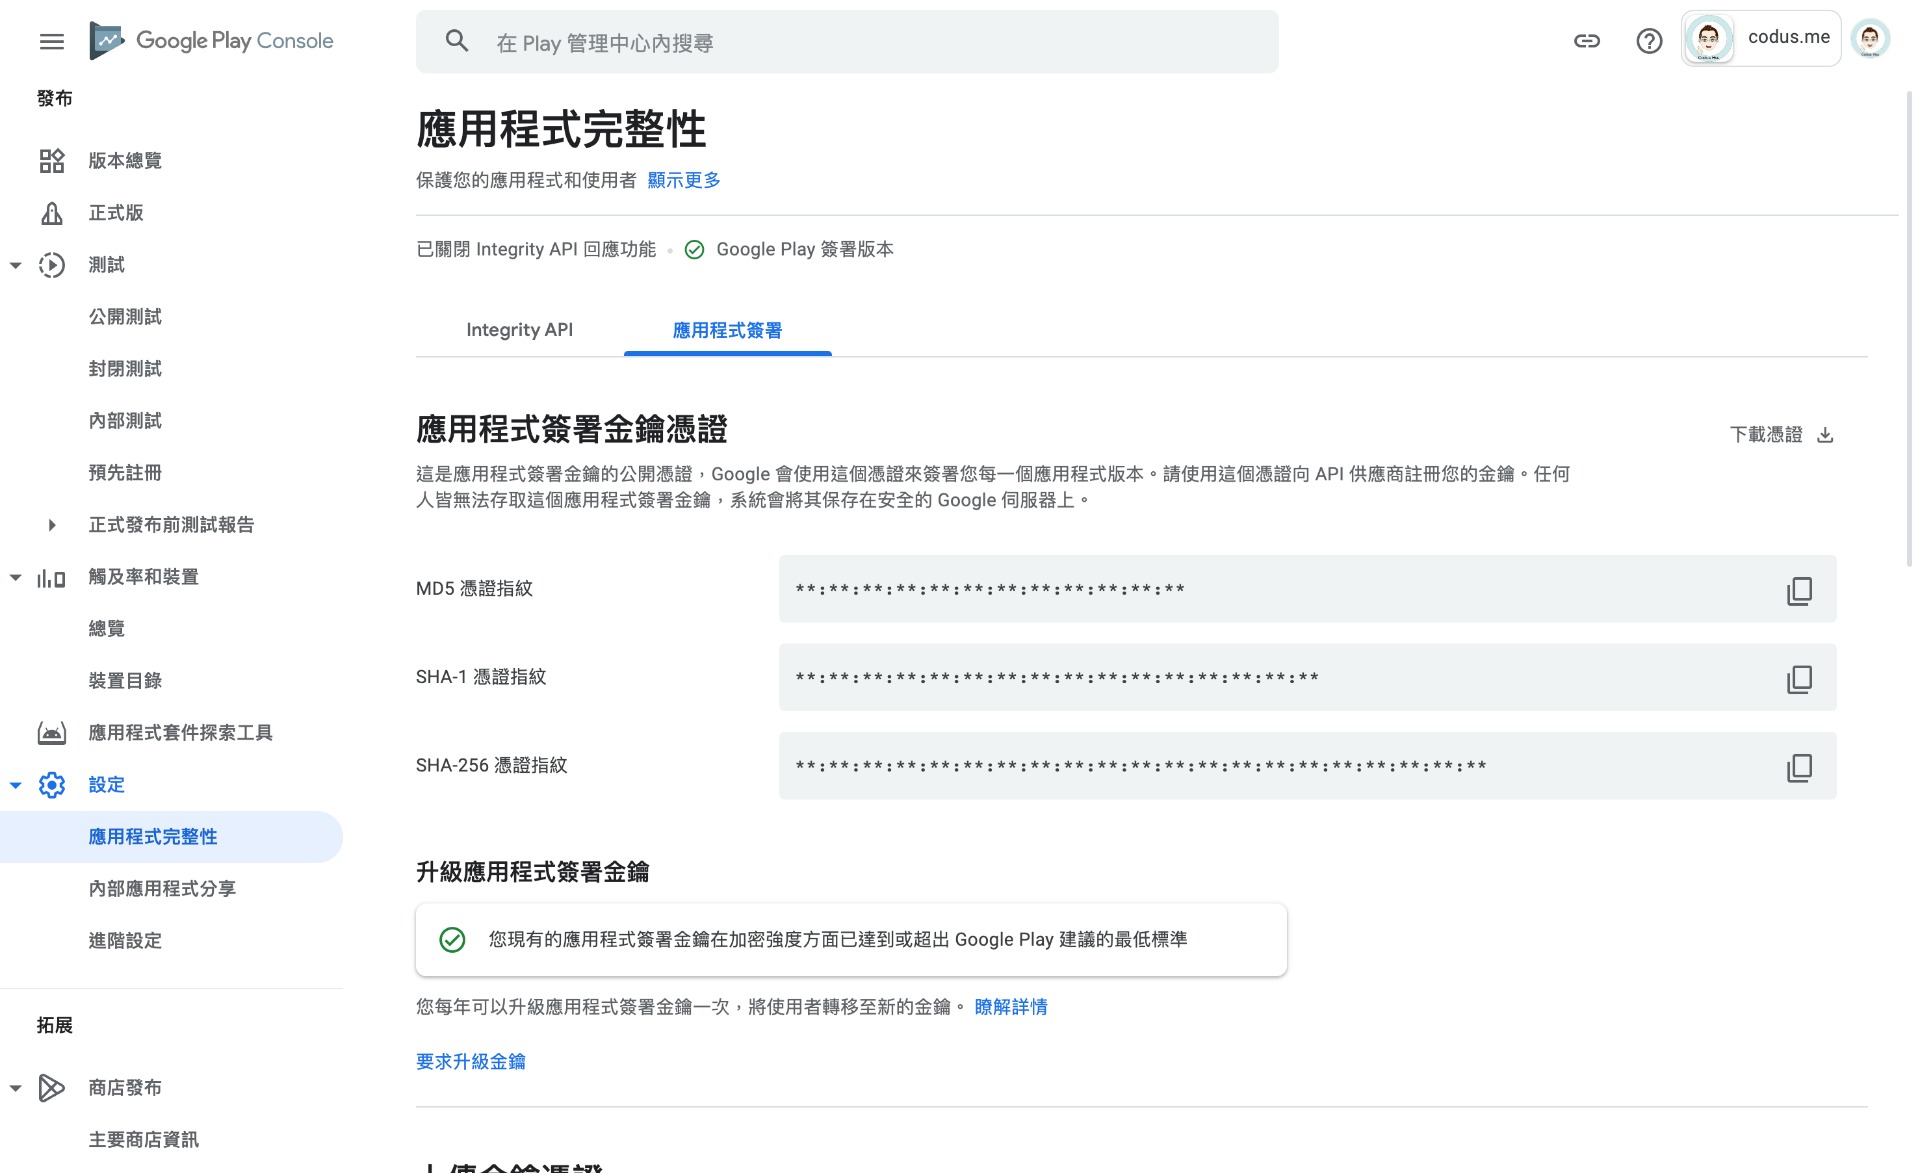
到 Google Play 查看應用程式簽署金鑰憑證
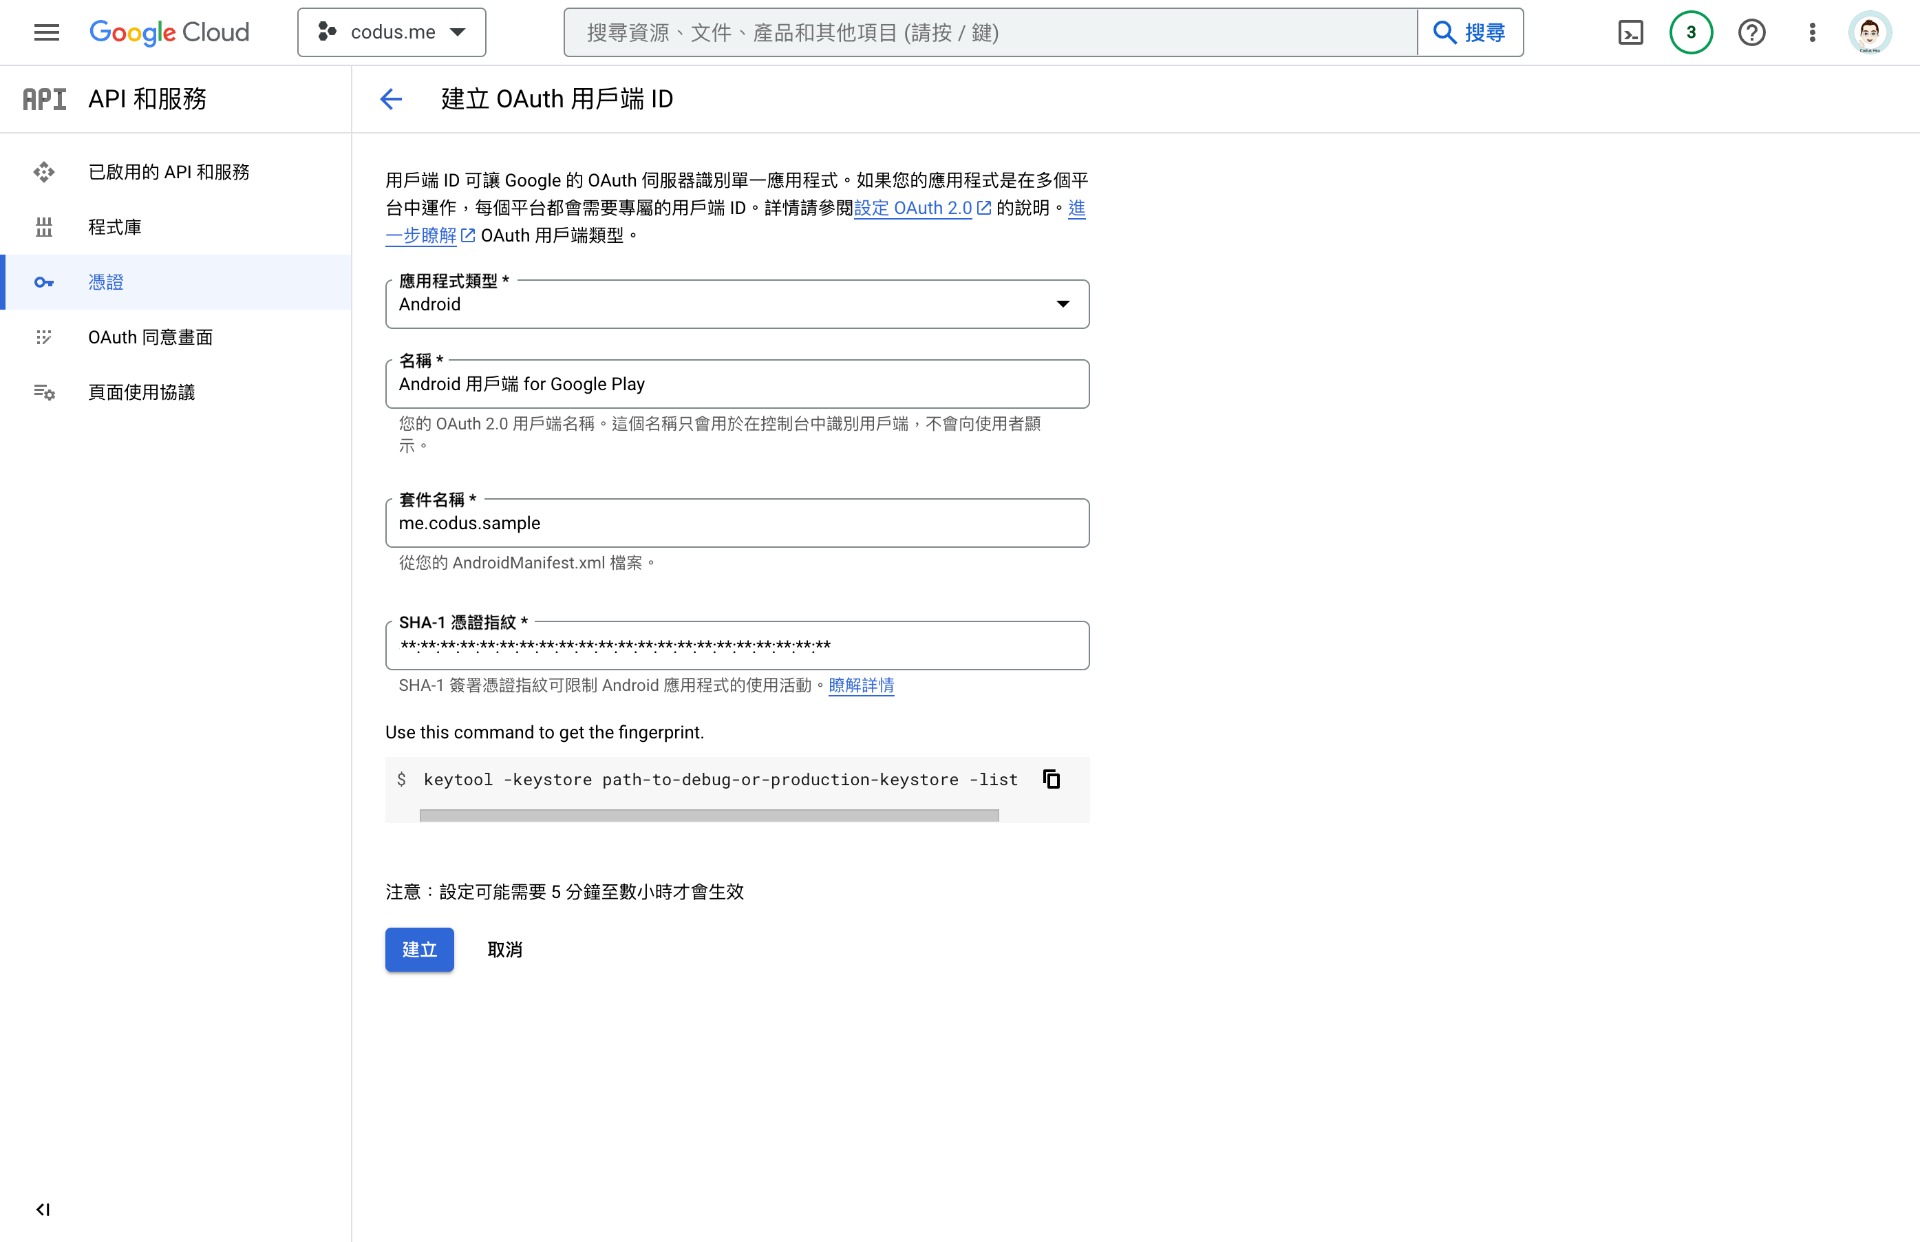
在 Google Cloud 建立 OAuth client ID